In the competitive business world, you need to do something better than your competitors. Adding website translation is one of them. There are so many reasons you should add a translate function to your website like growing business globally, increasing visitors and customers, engagement for the website, and also for social media, increasing conversion rates, reading understandable for everyone, legality for your business, user trust build, etc. It will help you to grow your business and win against your competitors. Know more about reasons…
I will explain how you can integrate the Translate function into your WordPress website. I selected the Gtranslate plugin for this, and it’s free. I chose this because I used this plugin in my clients’ business websites, and I didn’t face any issues, and I received appreciation for this function. This plugin has accurate translation, almost all features free, customizable options, 100+ languages, good layouts, etc. That’s why it’s popular and already installed on 5M+ websites with 3000+ 5-star reviews. The plugin developers always update this plugin, and it’s 100% secured for the website.
So let’s start to integrate Gtranslate into your WordPress Website:
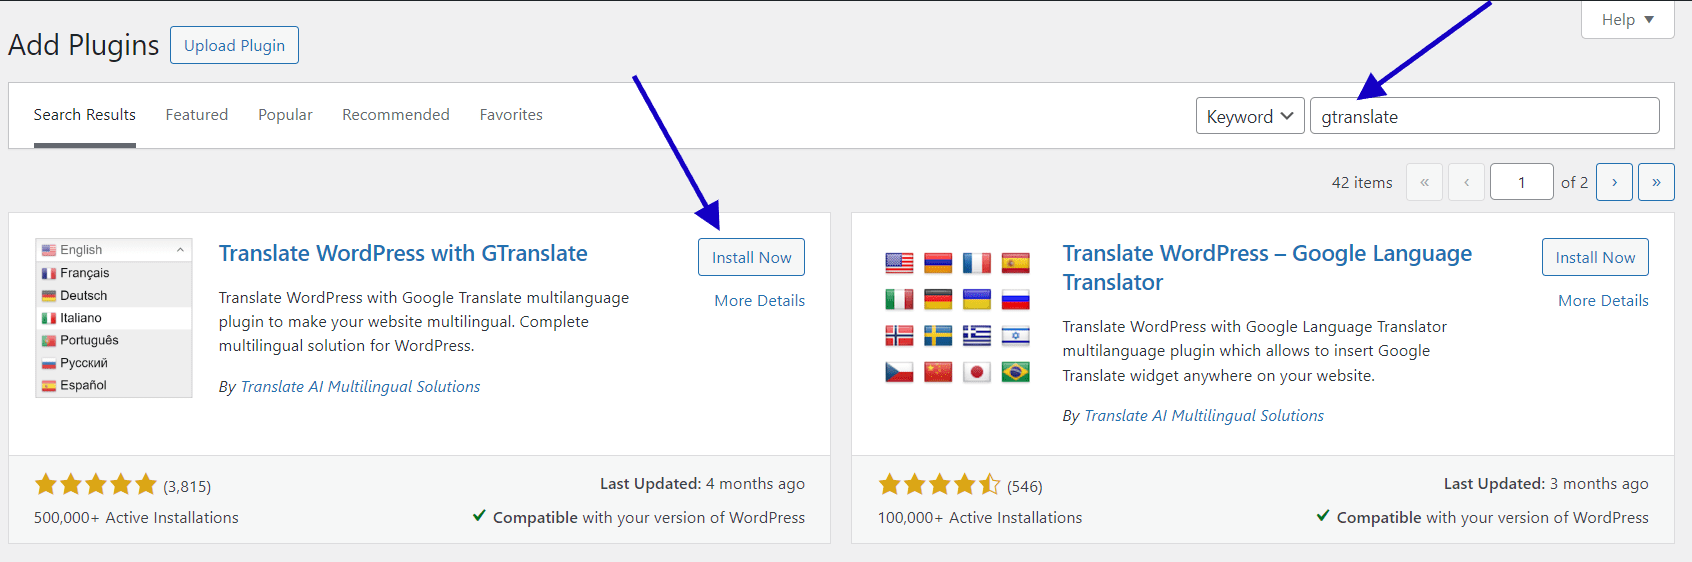
1. Installation & Active Plugin
First, log in to your WP dashboard, then go to the plugin page and click ‘add new’. Next, search in the search box for ‘gtranslate’. You will get a plugin whose name will appear in the first row: ‘Translate WordPress with GTranslate’. Click on ‘install and activate’. After activation, it will redirect you to the plugin page. Click on the ‘settings’ page.
2. Settings
After going to the settings page there are some important options to show the translate function on your website.
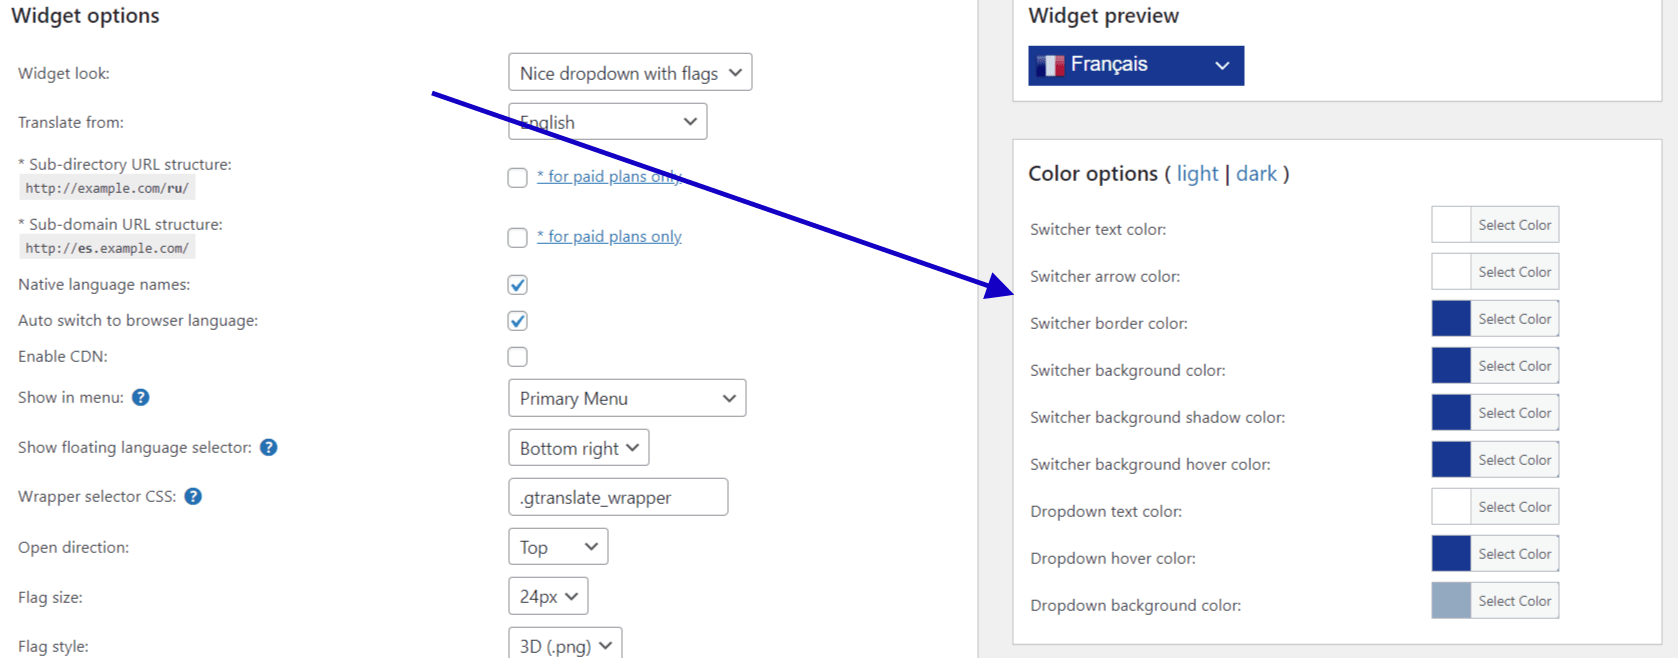
2.1: Widget Look
In the Widget look, you will get 11 options for the layout or design to show on your website. You will see the preview of the option on the right side of the widget look area. Explore all options and select the best one that is suitable for you. Every option is amazing according to the requirements.
2.2: Translate Form
In this area, select your main website language, which is used as the primary language, and other languages will follow this main language.
2.3: Native Language names
If you want to show your language name instead of the country, then I recommend you check this option. Example: Spanish to Español.
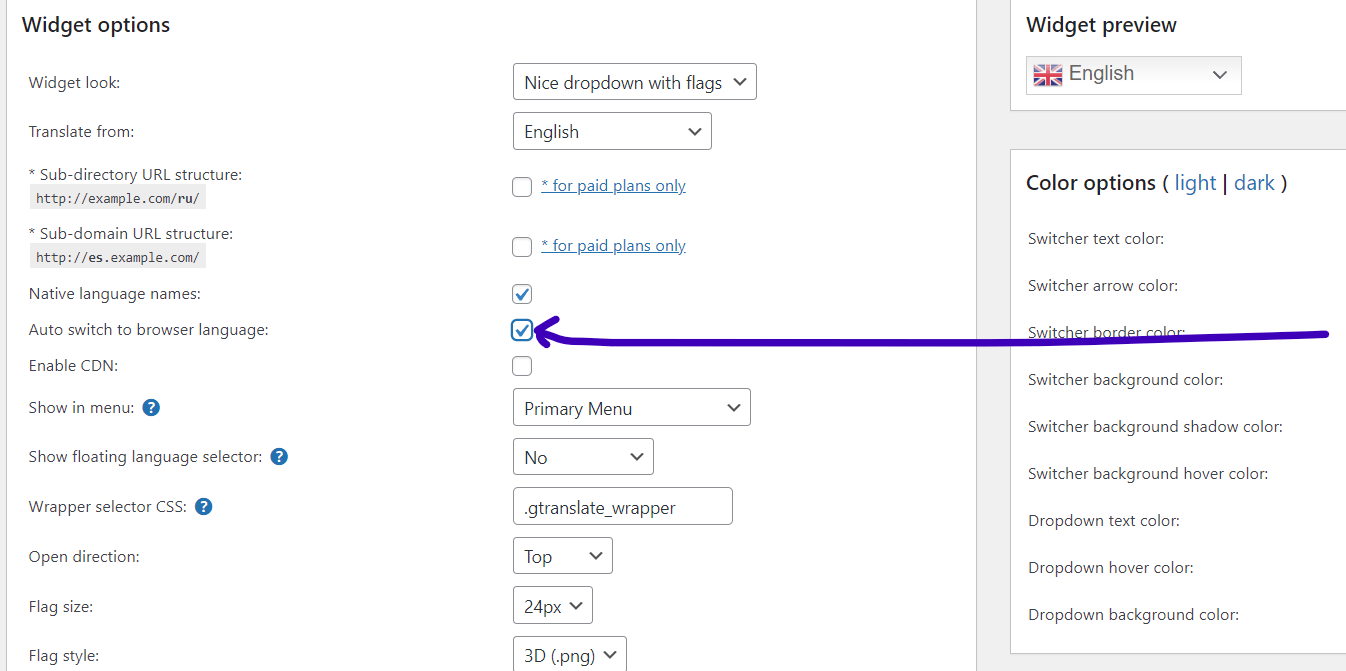
2.4: Auto Switch to browser language
It will help to change the language automatically according to the user’s browser language, so they don’t need to click on the function to change the language. It will detect the browser language and show your website with that language.
2.5: Show in Menu
This is most important regarding where in your website you want to show this feature. There are 4 options: Top bar, Header, Footer, and just in the mobile. But basically, you can use it anywhere on your website. But in the settings page, you have these 4 options. And 99% of the time, people use this function in the Header, Footer, and top bar. So just select one option.
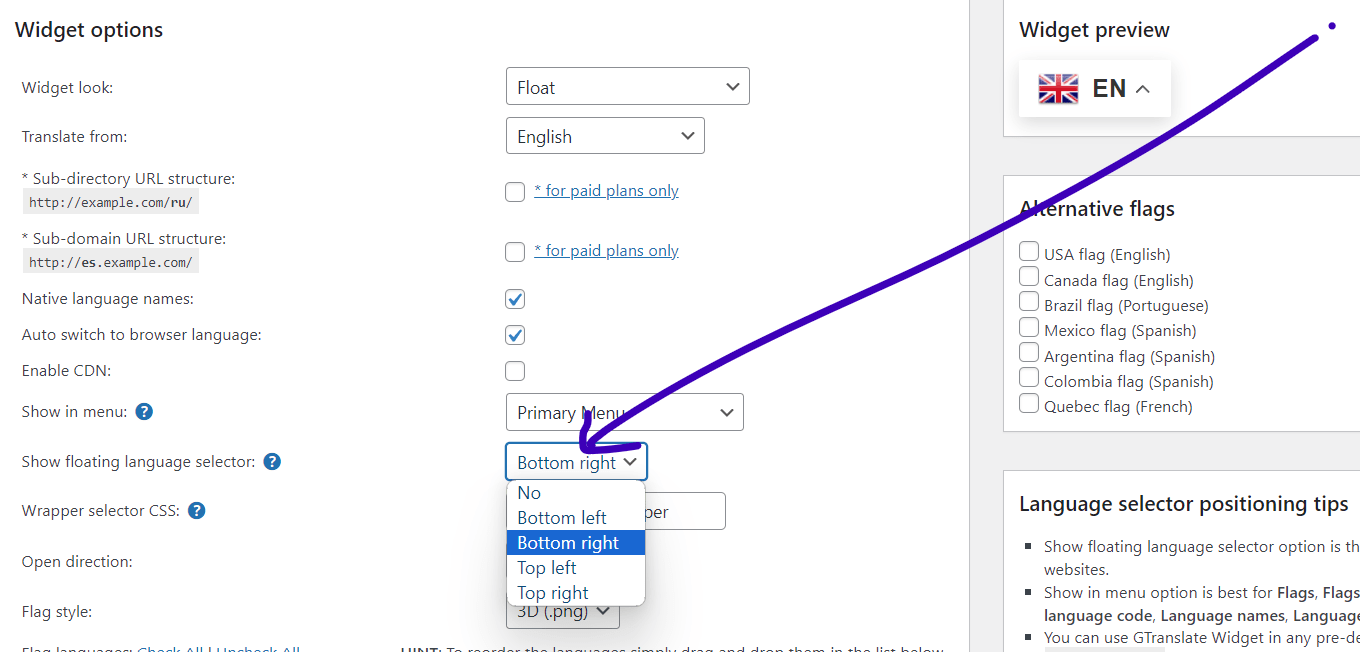
2.6: Show floating Language Selector
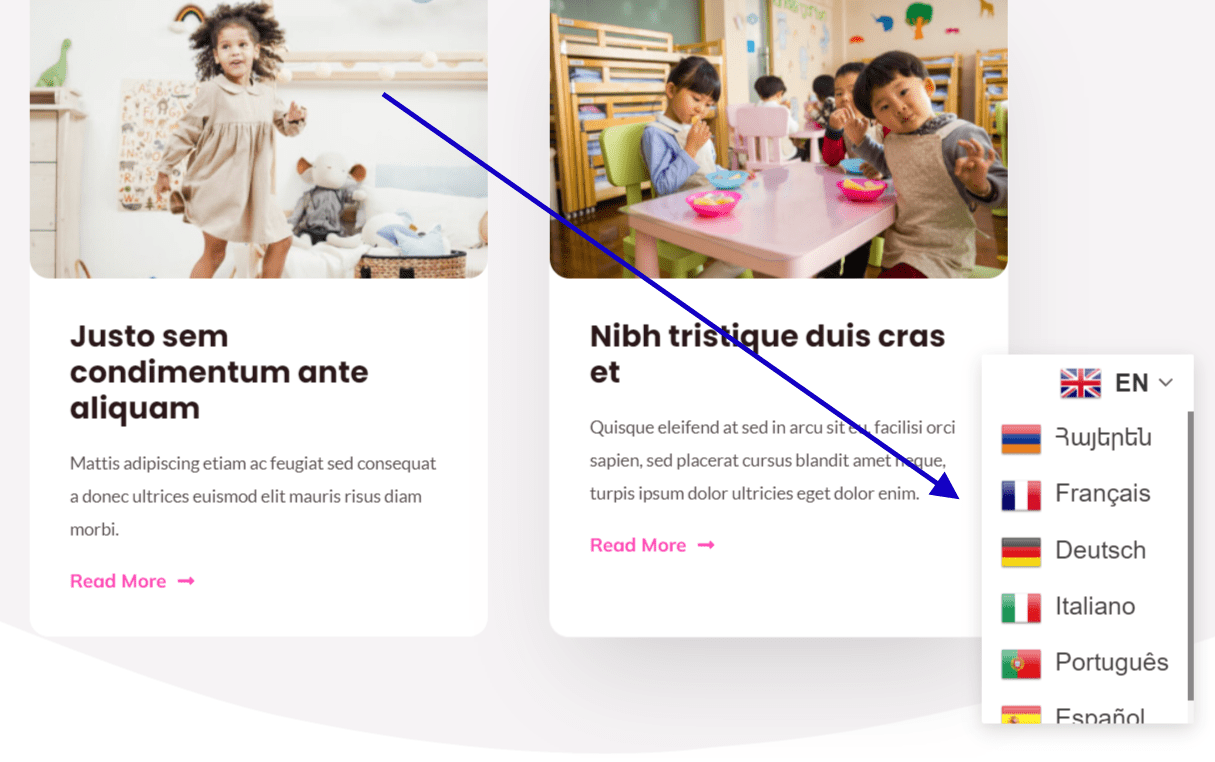
This is another amazing feature that you can add this option to your website’s 4 corners with a fixed position. Top left corner, Top right corner, Bottom left, and Bottom right corner. So if the user is scrolling, they can still change the language. That’s awesome.
2.7: Flag size and style
You can change flag style from 2D to 3D to make it more attractive. And also, you can change the flag size; the default value is 24px, which is absolutely fine for me.
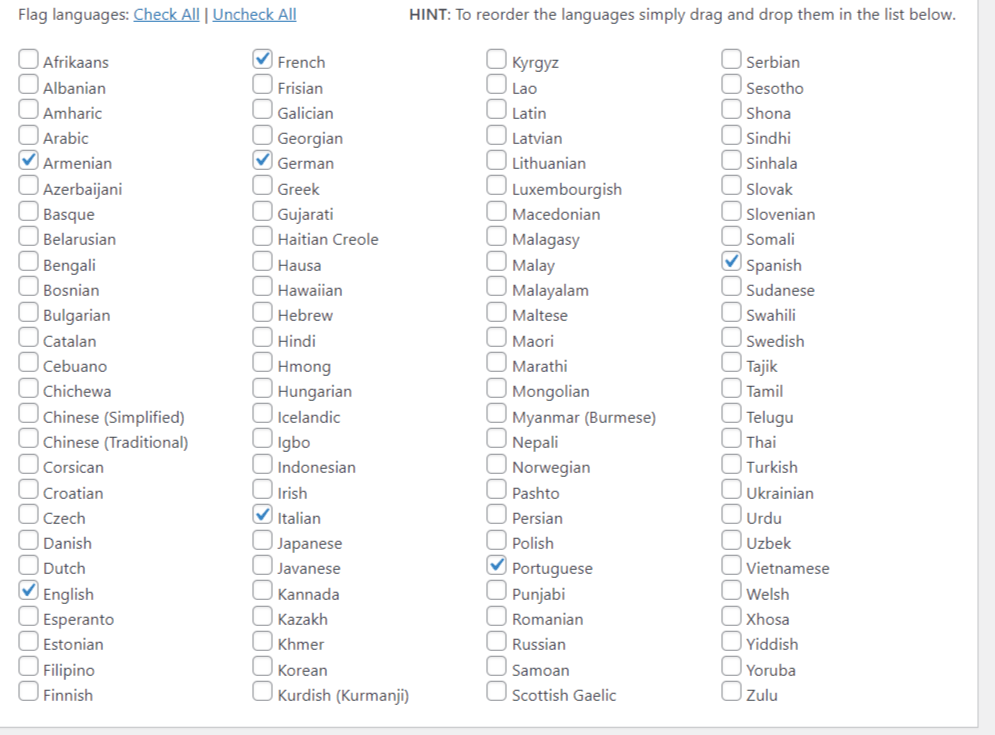
2.8: Select language
Now, this is the area where you will find more than 100+ languages. Select your targeted language. Just check the language.
2.9: Color Options
In the plugin right-side area, you will see the colors option; just change the colors that will make it more unique and creative. I recommend you to use a minimal design. You can change the color and see the preview at the top.
2.10: Custom CSS
Sometimes our requirements will be something different than we will need to modify the plugin. So you can easily do this. In the plugin settings page bottom area, you will find custom CSS. Just use this for custom style. Also, you can design it on the theme customize CSS area using the plugin id and classes.
2.11: Other options
There are some other options you can easily ignore. You can enable CDN if you want. The wrapper selector CSS will be there. Open direction, you can choose what you like. Open direction means how the options will be open by effects, like it will come slowly from the left side or right side, or you can choose top or bottom.
3. Customize and Save Changes
After all customization, just click on ‘Save changes’ in the bottom area. Then check your website, and you will see the multilingual function available on your website. Great Job, my Friend.
Why Choose the Gtranslate Plugin Over Other Plugins?
Why you will Choose the Gtranslate Plugin Over Other Plugins?
Here are 11 reasons why you should select Gtranslate compared to other plugins.
1. Minimal Design
The Gtranslate plugin features a minimal design, making it easy for users to understand even if they lack knowledge about plugin setup. The translation process option is creatively designed and eye-catching, making it a superb inclusion for your website. You can navigate through the design options in just a few seconds. Yes, in just a few seconds!
2. Easy to Use and Customize
This is the easiest way to use a translation plugin. Just activate and install it, then set it up with your language preferences, select the design option, and choose where you want it to appear. That’s it. Your website will become multilingual. Additionally, you can customize it using CSS in the plugin settings page, as well as customize it using CSS class and ID to change the style and layout.
3. No Coding Needed
Gtranslate plugin eliminates the need for coding. Just set it up and save; the function will work automatically. The plugin is designed for both tech-savvy and non-tech-savvy individuals.
4. Very Quick Process
Unlike other multilingual plugins that require a significant investment, the GTranslate plugin can translate your website in just a second. Set up the plugin, save changes, and your website will have the option to change languages. When someone clicks on the language change option, it takes just a second to accurately translate the page.
5. Simple And Understandable
The gTranslate plugin interface is straightforward and easy to understand for users of all types. The options are clear, making it a favorite among users who love and recommend it, just like me.
6. Ability to Translate Large Contents
Don’t worry if your website has a large amount of content. This plugin can handle extensive content translation efficiently and quickly.
7. No Issues
While some plugins cause issues and errors on websites, I have used the GTranslate plugin on numerous websites without encountering any problems. It is a smooth and flawless plugin.
8. Secured and Fast
GTranslate plugin developed by Edvard Ananyan, the founder & CEO of GTranslate Inc., a young physicist holding a Master’s degree from YSU. Learn more about him here. GTranslate is a leading website translation services provider since 2008, powering more than 500,000 websites worldwide. This plugin is free from security issues and is exceptionally fast.
9. 100+ Language Supports
The GTranslate plugin offers support for more than 100 languages, covering most countries. There is no extra payment required for these options, making the developer’s commitment to user satisfaction evident.
10. Amazing Plugin Support
The plugin support is exceptional, providing assistance like a good friend. If you encounter any issues, visit their website or create a topic on WordPress support, and you will receive help.
11. SEO Optimized
The GTranslate plugin helps you optimize your website for SEO in all selected languages. While this powerful feature is paid, it’s a worthy investment to fully optimize your website in different languages. Learn more here.
I hope you now have clarity on why choosing GTranslate is beneficial, and you’ve gained insights into integrating it with your WordPress website. If you want to understand why every website should have a translation option, click here. Thank you.
Tohidul Pappu
Founder of TIWebView
www.tohidul.info
Thanks for reading the blog.
Don’t forget to share this post!
Learn & Share
RELATED POST